Azure provides 3 administration tools to choose from
- The Azure Portal
- The Azure CLI
- Azure PowerShell
● We can use the Azure GUI portal website (portal.azure.com) to create, configure, and
alter our Azure subscription resources.
● We can locate the resource needed and execute any changes. We have wizards and
tooltips to guide through various administrative tasks.
● Please note that we cannot use the portal to perform repetitive tasks like creating 12
VMs etc.
● We need to use other tools to avoid errors, and it will also be a time-consuming process
to do on the portal.
The Azure portal can be divided into 3 sections.
- Left — A list of resources and services to create and manage your Azure environment.
- Center — A dashboard that you can tailor to meet your (Public or Private dashboards)
needs. - Top — A search bar to quickly find resources and services, a notification icon, access
to a web-based command line, and more.

● Let’s try to create a resource and see how to use the Portal. For example, let us
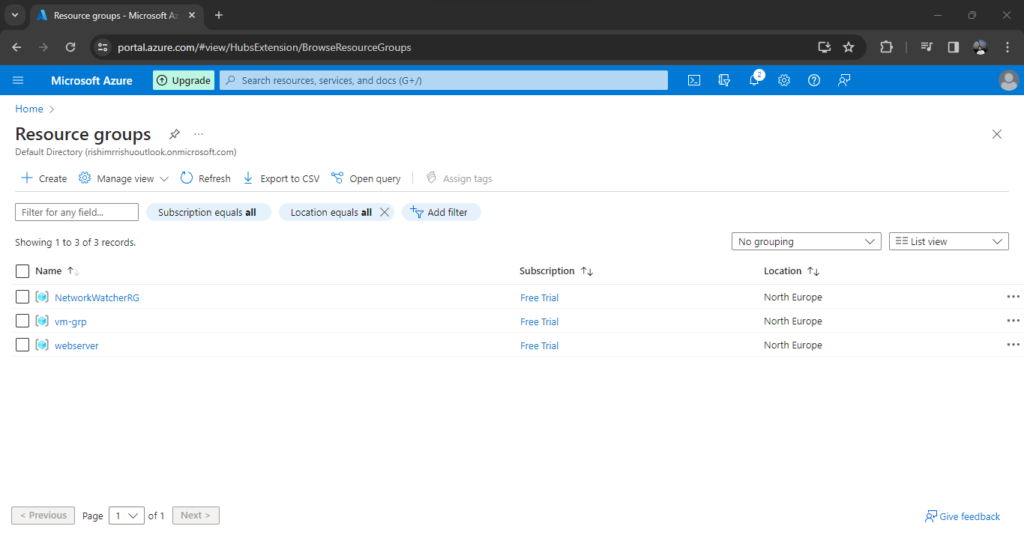
● Click on the Burger menu on the left top and select Resource group and click on it.
You will get a new Panel.

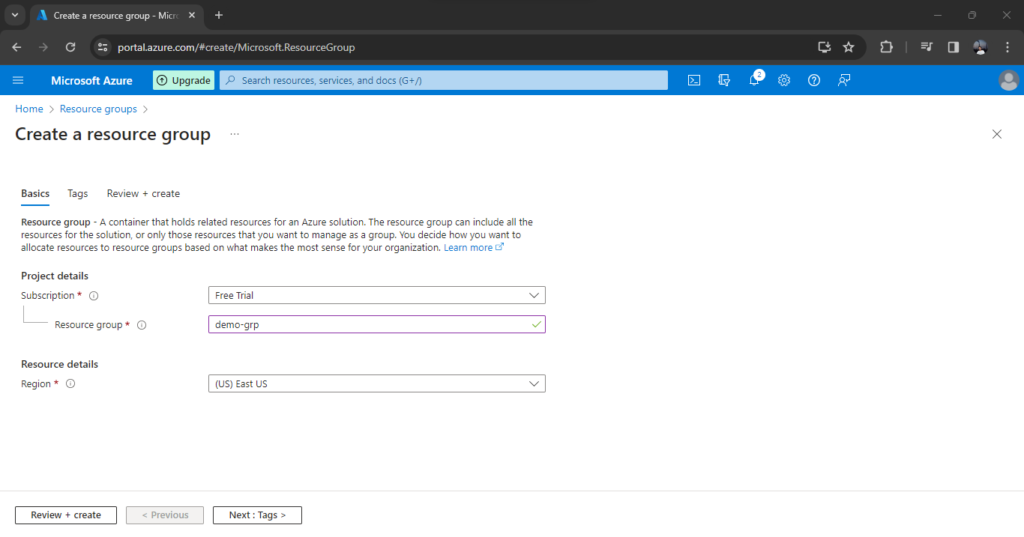
● Click on the +Create icon. On the new Panel, add the name of the resource group
and choose the desired location.

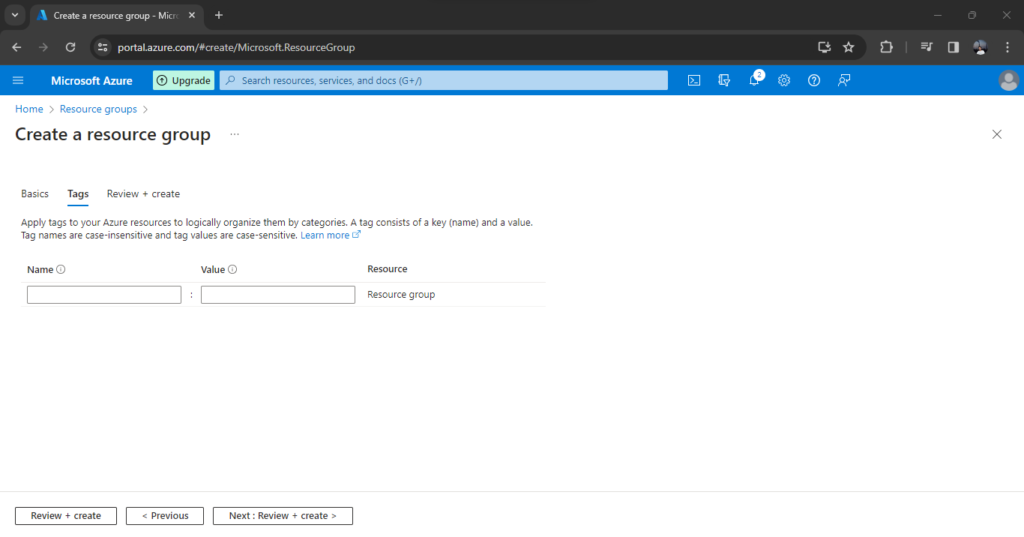
● Click Next, and you will get a new panel to add Tags. Tags are helpful for accounting
and segregation but not mandatory.

